
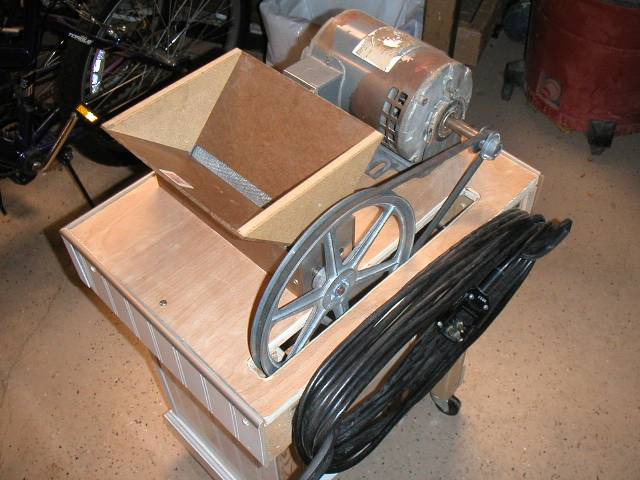
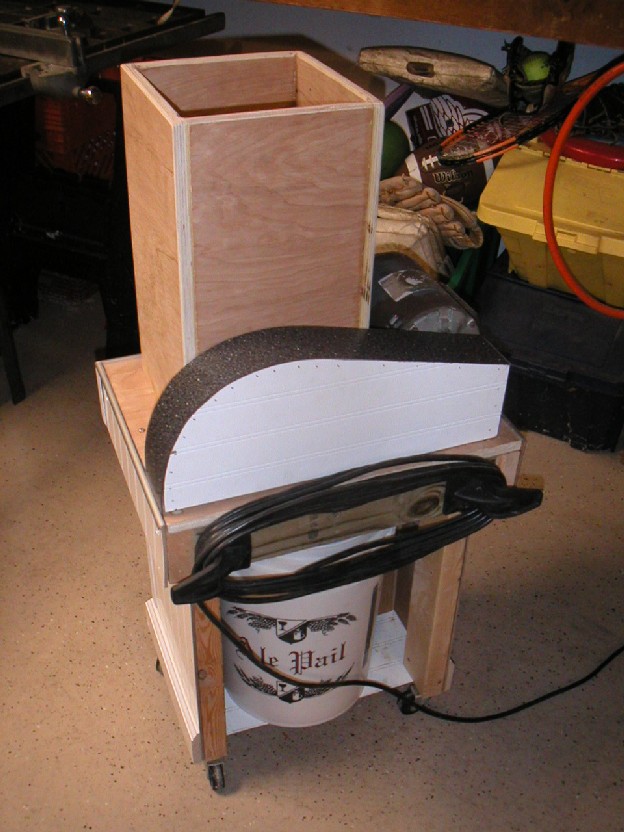
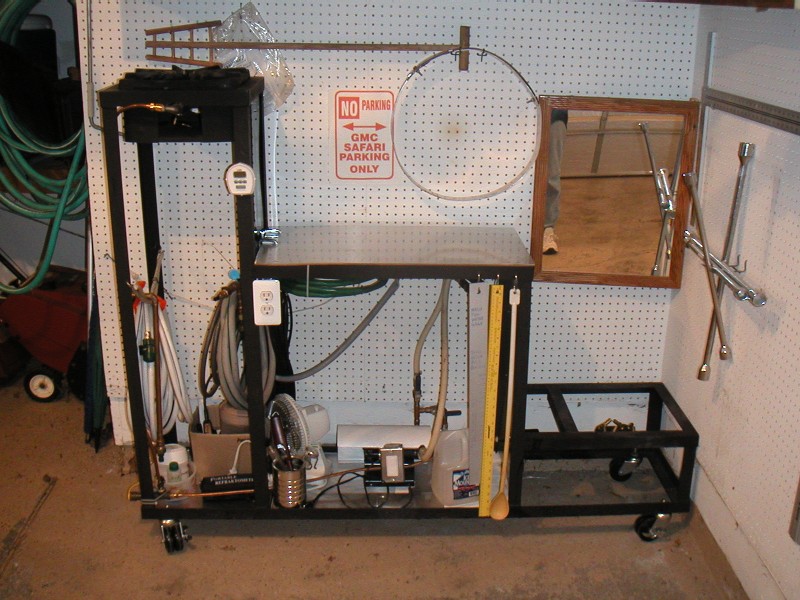
Motorized JSP Malt Mill with cart
1/3HP 1725 RPM => Mill Speed 194 RPM - 50' Cord with GFCI

Updated: 7-26-2014
Grain Mill Page - Motorized JSP Maltmill
A three part series where we brew a 20 gallon batch of Denny's Rye IPA.
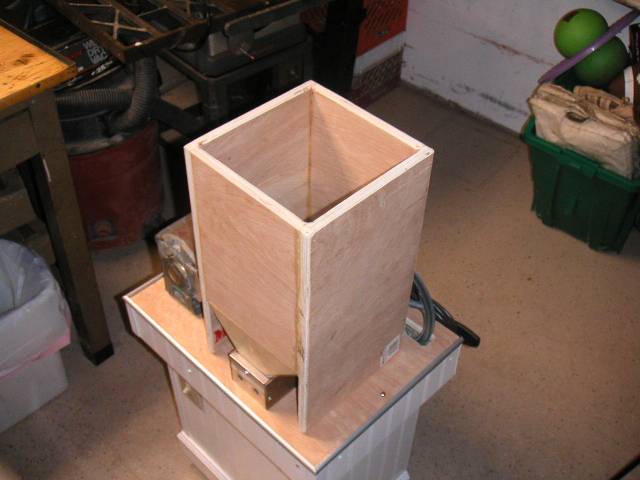
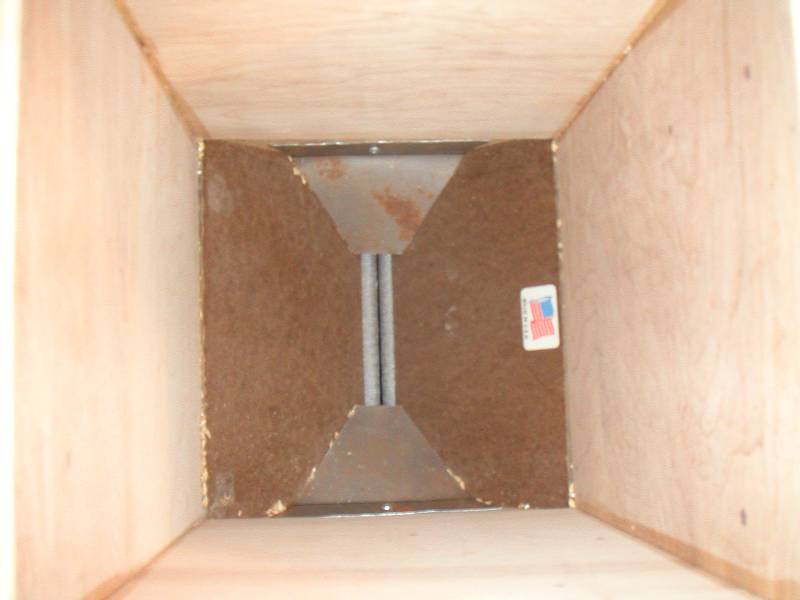
08-Oct-2006 - Today I retired my Corona grain mill and replaced it with a JSP Malt Mill. I picked it up from a friend at work who didn't have time to brew anymore. Cost was $40 plus a 12-pack of Oktoberfest. I built the extra large capacity hopper with the idea coming from a fella named Stirplate on Northern Brewer's forum. The knurled rollers are 10" long and really make a nice crush and power through a 40 lb grain bill in no time. I bought a 1.5" pulley with 5/8" bore, a 10" pulley with a 3/4" bore, a 1/2" X 3/4" bushing and a 40" Type 3L V-belt all from Graingers for about $23 total. The rest of the stuff you see is all leftover scraps of lumber and electrical stuff from various odd jobs. The pulley ratio gives a grain mill speed of about 194RPM. Here are the pictures:
|
|
|
|
|
|
Motorized JSP Malt Mill with cart |
1/3HP 1725 RPM => Mill Speed 194 RPM - 50' Cord with GFCI |
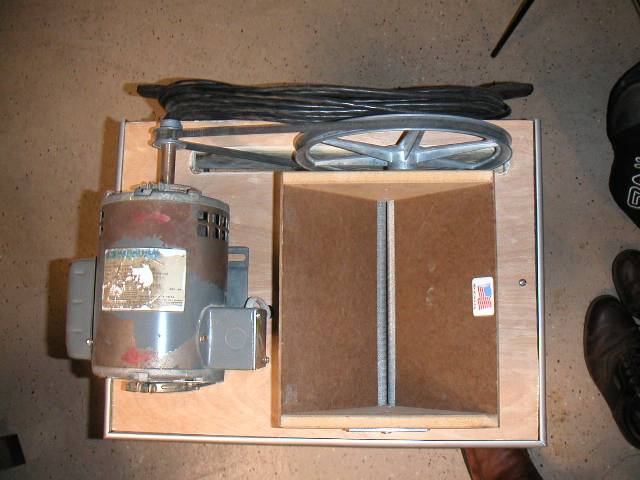
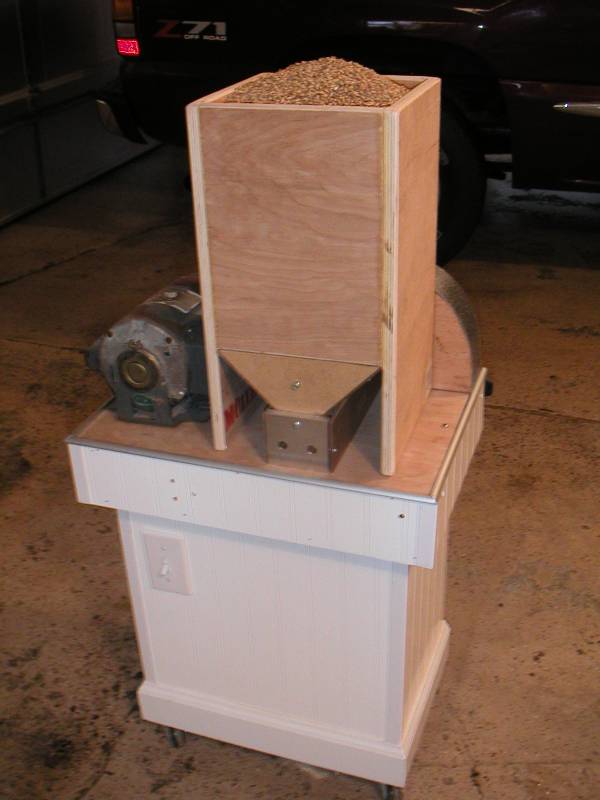
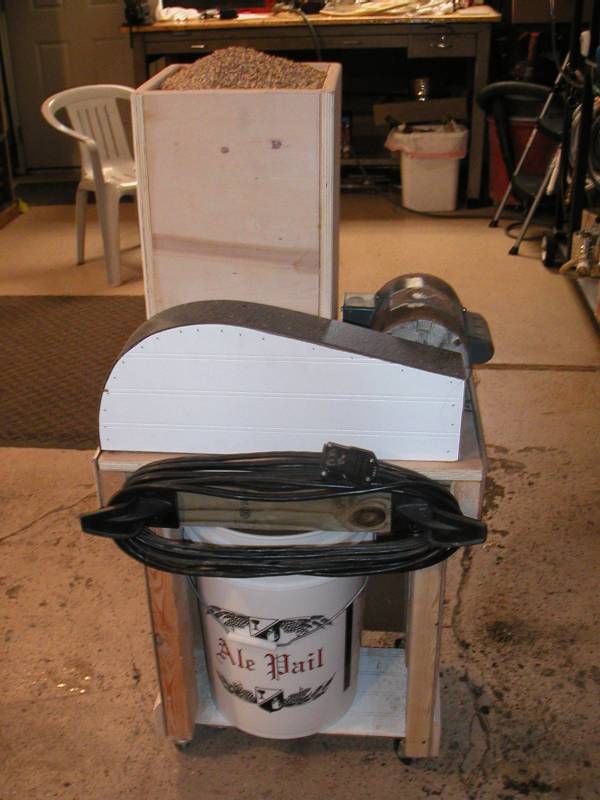
10" Long Knurled Rollers Grind 40 lb. FAST | Extra Large Removable Hopper Stores Underneath Mill |
|
|
|
|
|
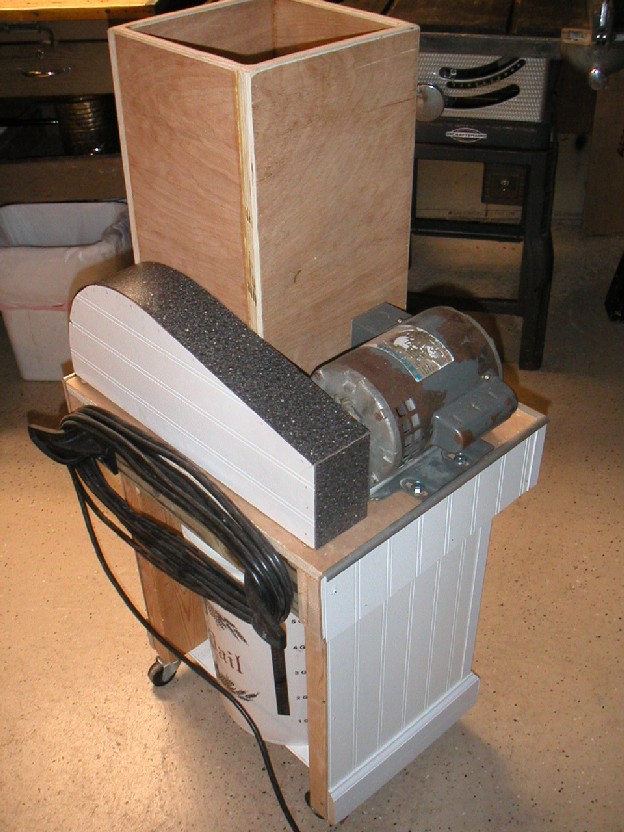
| Custom Made Guard Fits Around Pulleys To Prevent Accidents | 6.5 Gallon Bucket Fits Underneath to Catch Grist | Guard is Attached By One Screw Through Hopper | 25 lbs of Belgian Pilsner Malt |
|
|
|
|
|
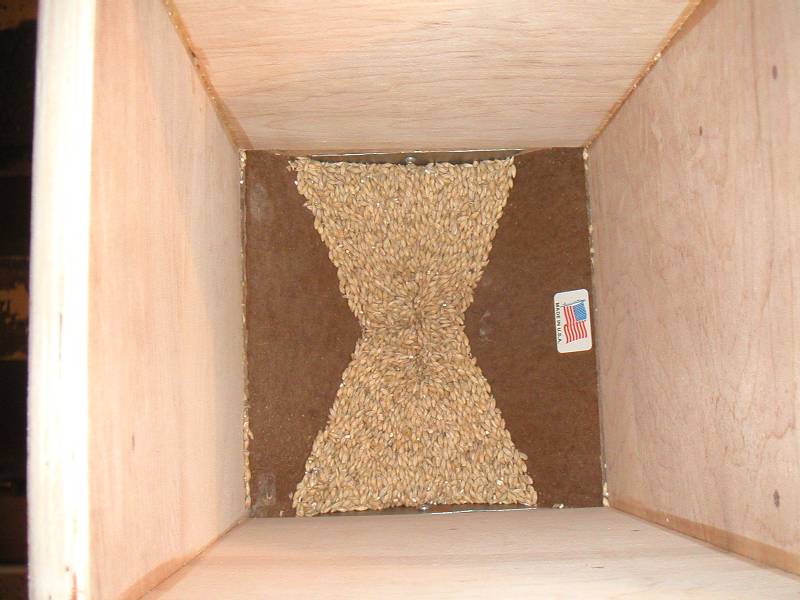
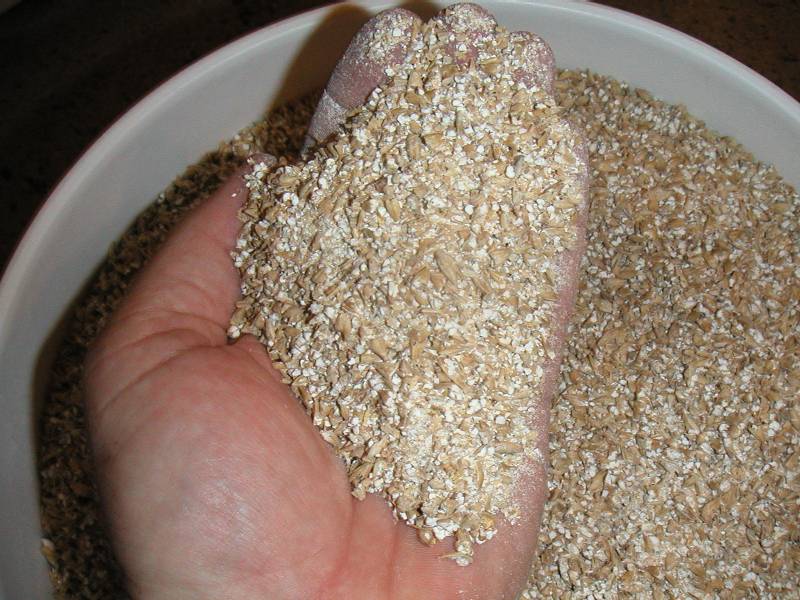
| 25 lbs of Belgian Pilsner Malt | 100 Seconds Later | Guides Help Reduce Startup Torque | Perfect Looking Grist Ready to Mash |
View the Grain Crushing Video - Motorized JSP Maltmill
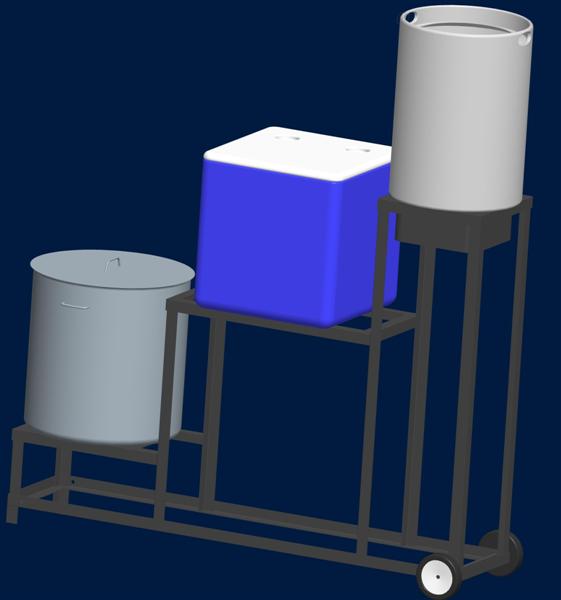
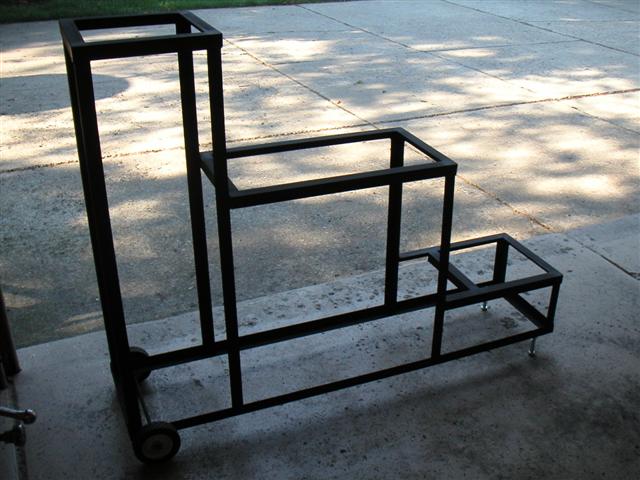
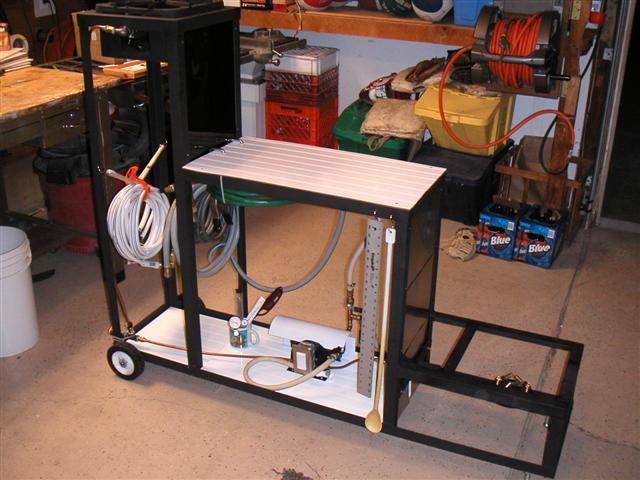
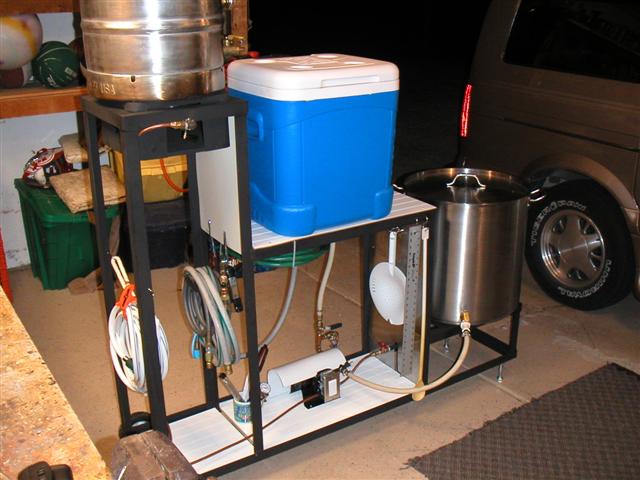
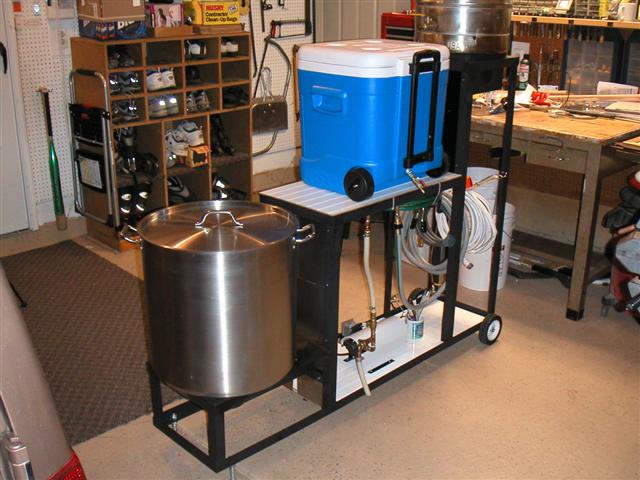
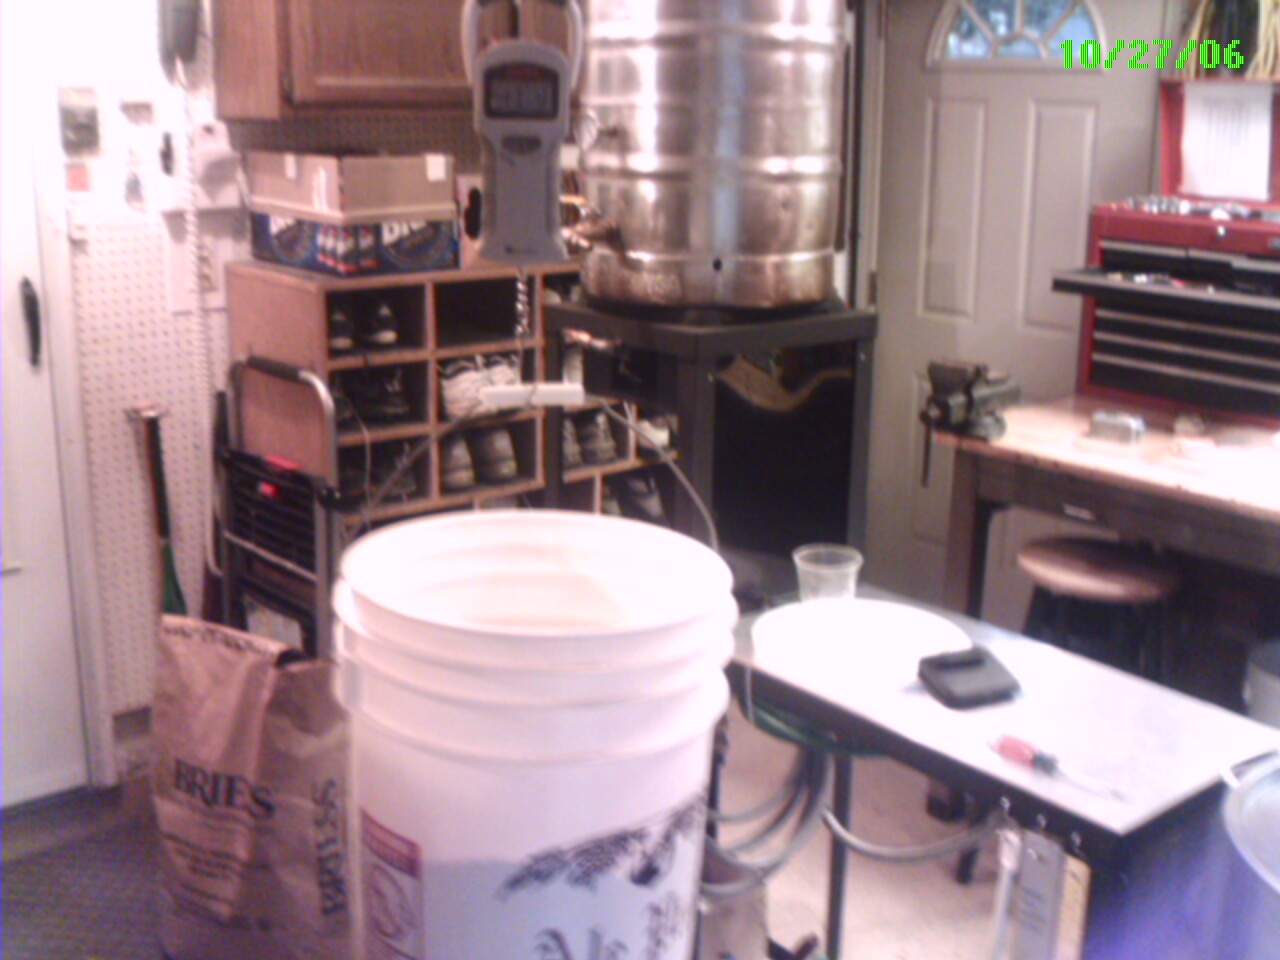
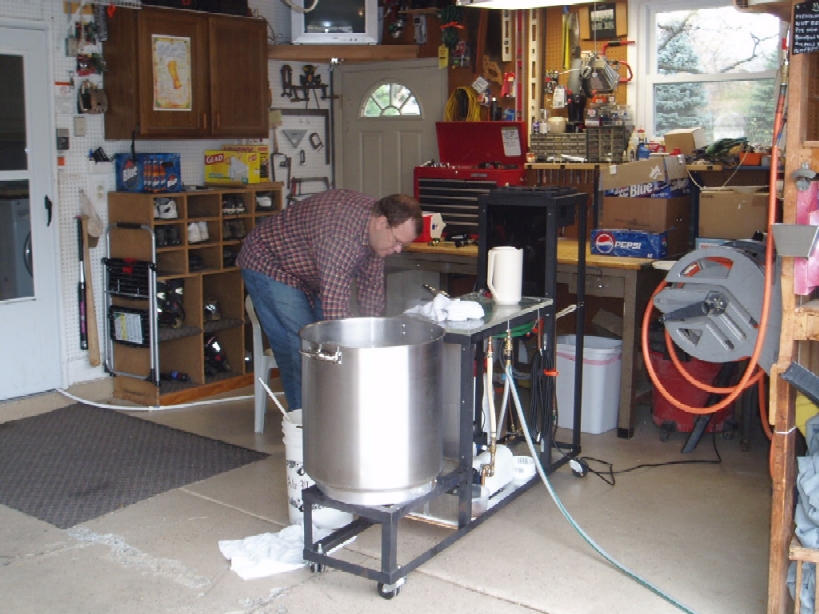
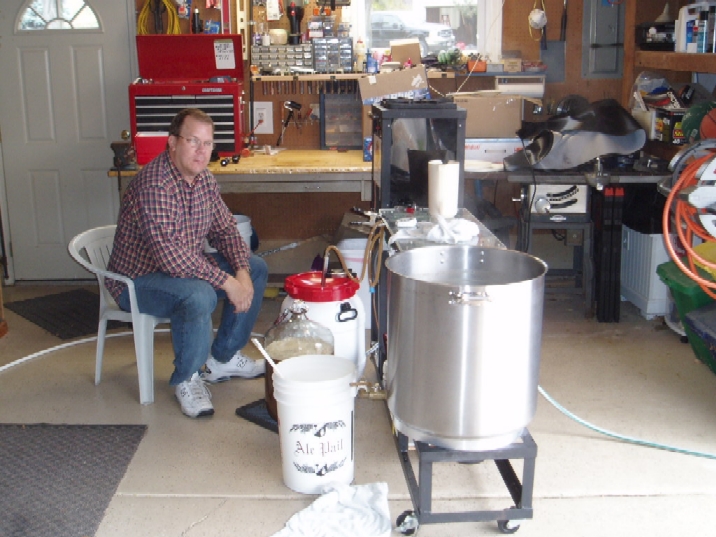
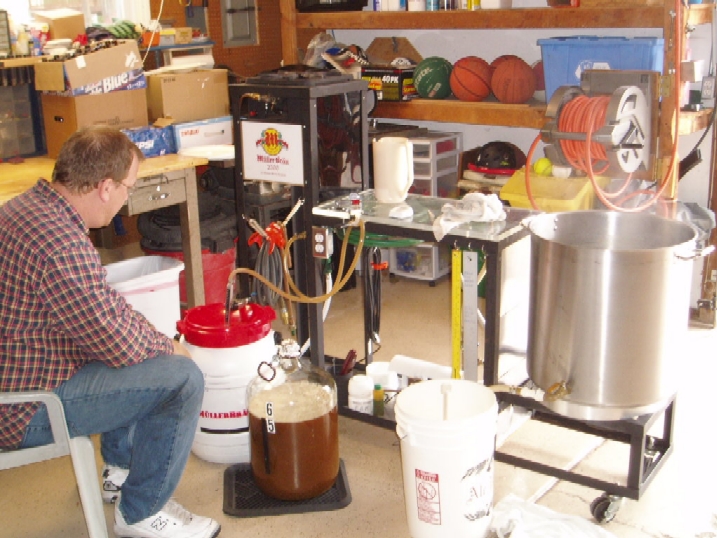
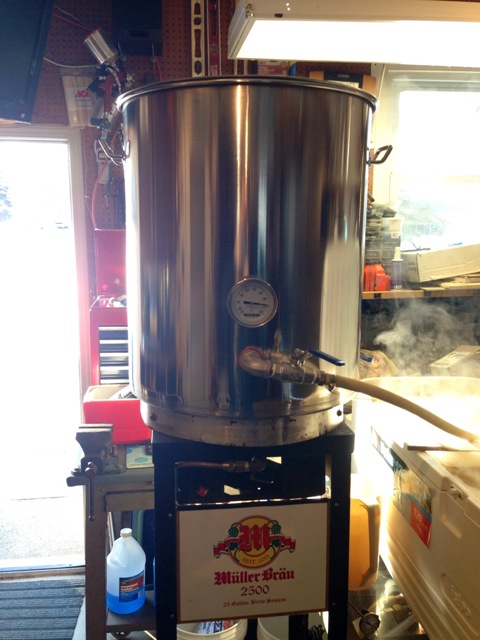
23-July-2006 - I got tired of making 5 gallon batches so I set out to upsize my brew system. I bought a 25 gallon SS megapot from Austin Homebrew for $199 and free shipping and bought a March 809-HS mag drive pump for the wort transfer. I had a friend model up the concept for the new brew cart on Pro Engineer. Then he borrowed a MIG welder and we spent the better part of a day welding and fabricating all the pieces. Then when I got it home, I spent a few more hours putting the finishing touches on it. I took great care to keep all the brewing equipment on the cart and ready for use.
Now I can get 4 times the amount of beer from the same brew session with less work. No more heavy lifting of hot liquids.
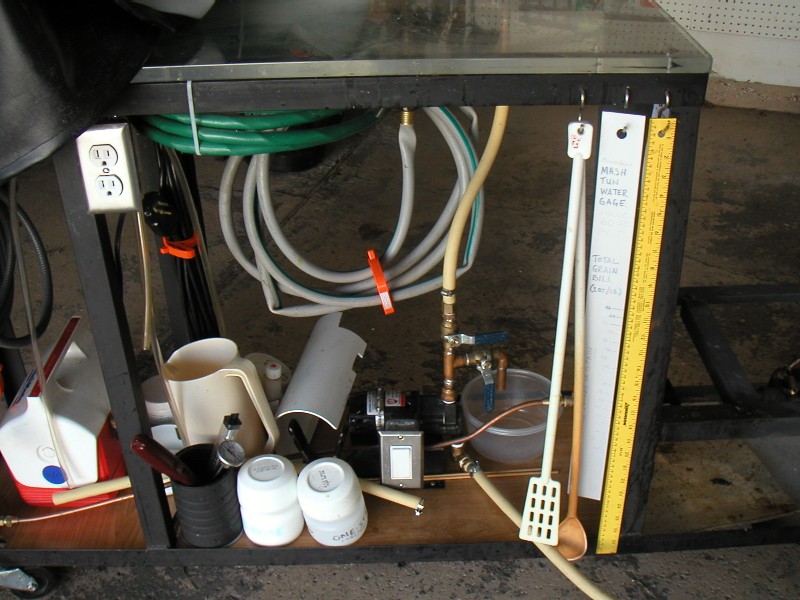
9-11-2008 I'll give you all the details about my brewcart and with a little tweaking, you can make one to suit your needs. I bought my steel at Home Depot. Probably could have been cheaper if I went to a steel company. The steel for mine is all 1.5" X 1.5" X 1/8" thick angle iron. I made the inside opening for the Superb burner to drop in exactly 11.75" X 11.75" and the burner fits in real nice. Here are some of the other dimensions measured from the bottom of the stand (base) where applicable:
overall length 64"; overall width 15"; overall height 48"; ground to base 4"; base to BK surface 10"; base to MLT surface 30"; base to HLT surface 48"; length of BK surface 20"; length of MLT surface 29"; length of HLT surface 15"
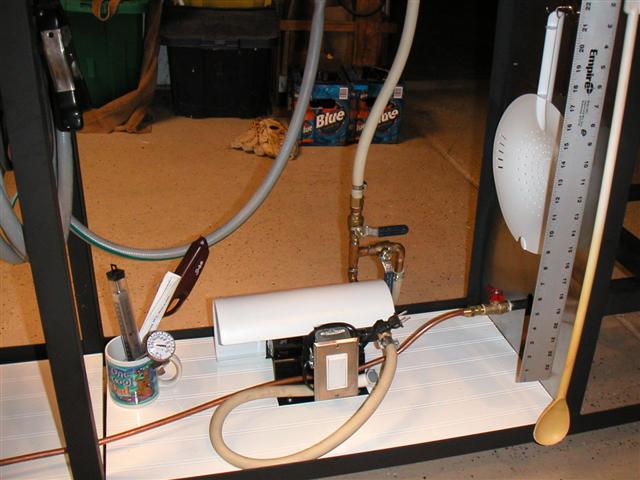
I changed a few things after making the stand and using it a few times. One thing was the wheels. I removed the two wheels under the HLT and the two adjustable pegs under the BK. I replaced them with heavy duty locking swivel casters. They were $15.12 each from McMaster Carr. Much better maneuverability. (4) Swivel Casters McMaster Carr p/n 87845T172 DUAL-WHEEL THREADED-STEM CASTER, W/BRAKE,3" X 1" RUBBER WHEEL,1/2"-13 STEM,250#CAPACITY I also recommend a waterproof top where the MLT goes. I started with wood paneling but eventually replaced it with a thick piece of acrylic. Put as many hooks and things onto the brewcart as you think you will need. I also hate always trying to figure out how much strike water I need in the MLT so I made a SS ruler with the marks showing corresponding pounds of grain. Then I fill up my MLT until the depth is equal to the total weight of the grain bill. Same concept for another ruler to measure the volume of wort in the BK.
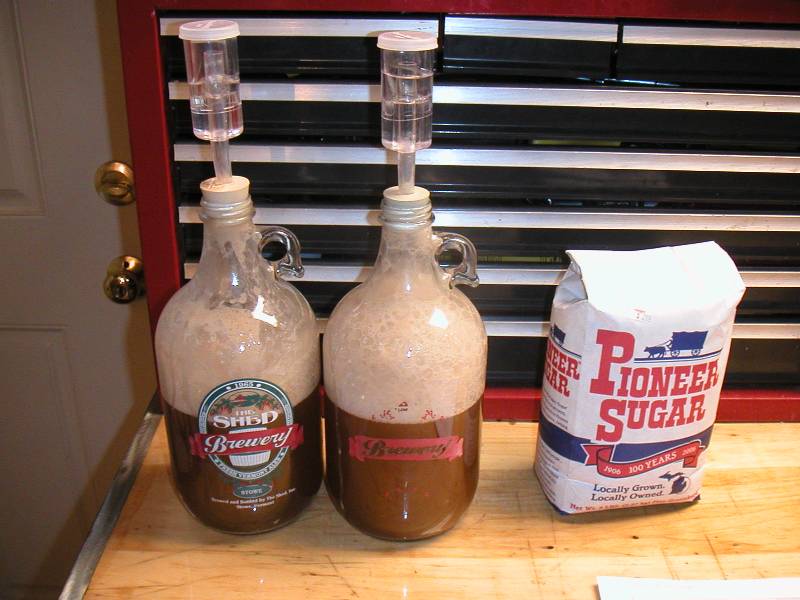
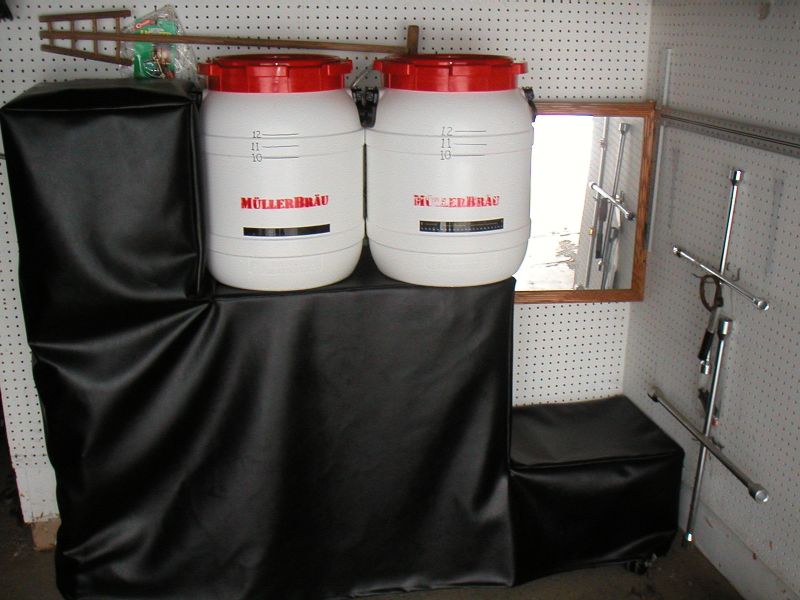
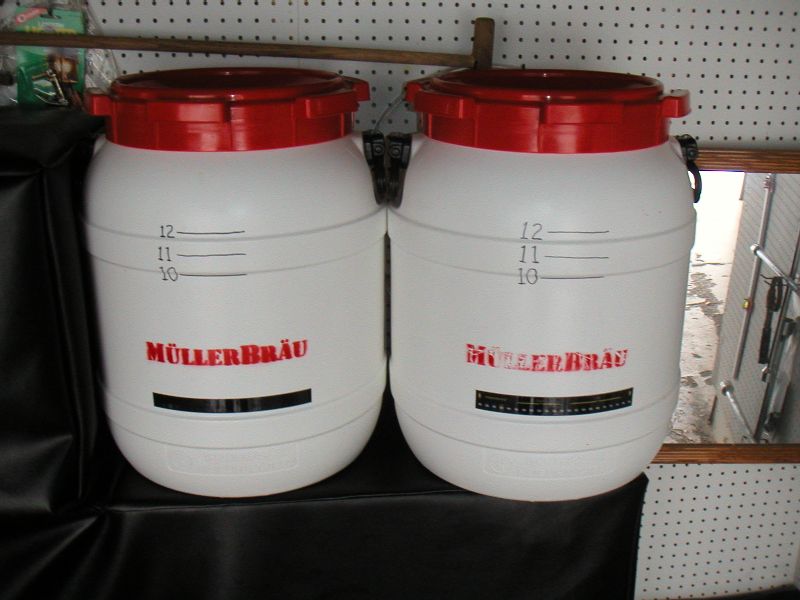
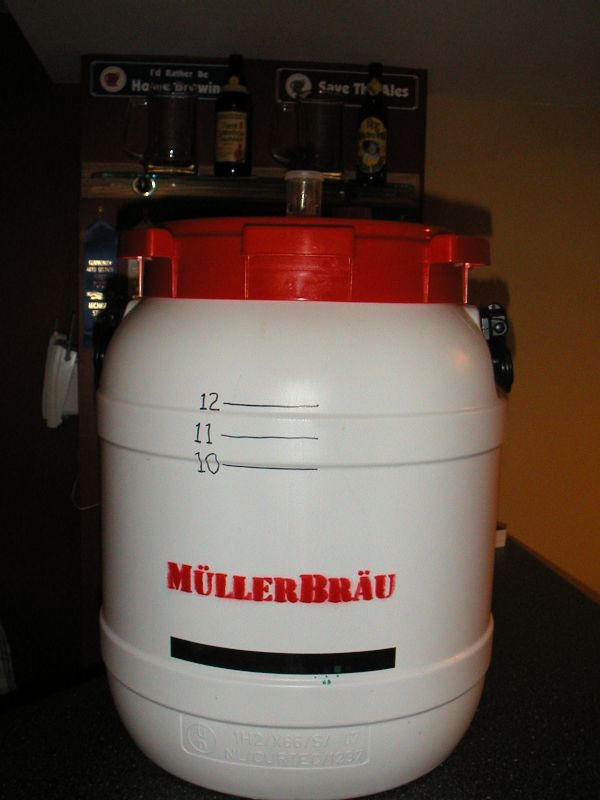
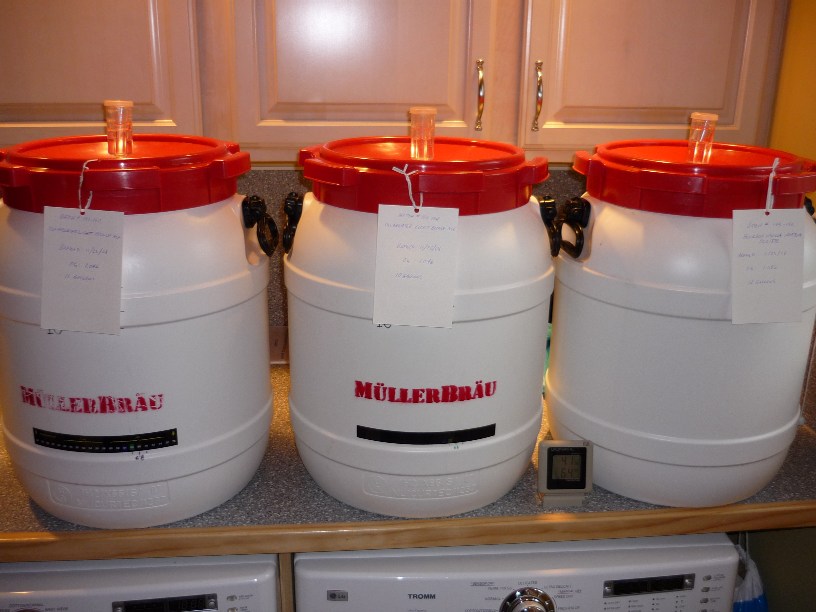
1/30/2011 Note About the Big Red and White Fermenters
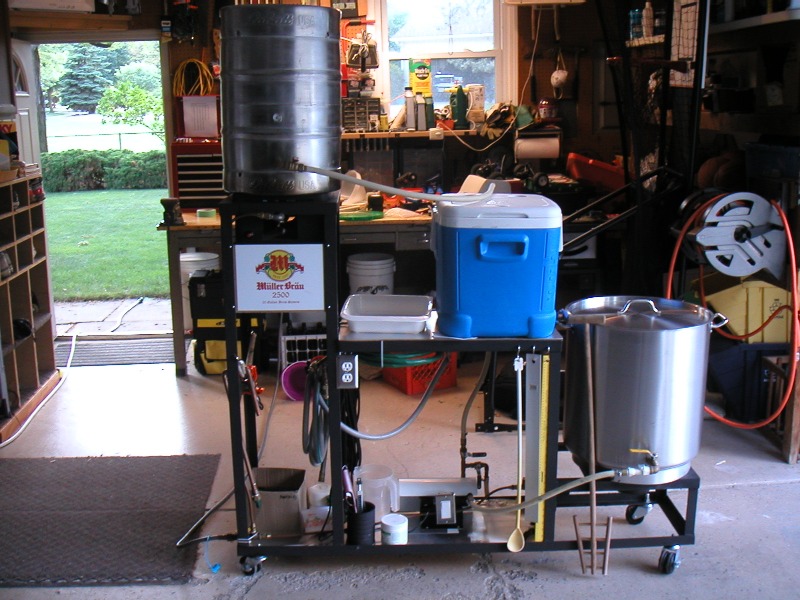
MullerBrau 2500 - 25 Gallon Homemade Brew Cart
 |
 |
 |
 |
|
The Concept Model (ProE) |
Welding and Grinding Complete |
35K BTU Hot Liquor Tank Burner In and Panels Added | Heat Shields Added |
 |
 |
 |
 |
|
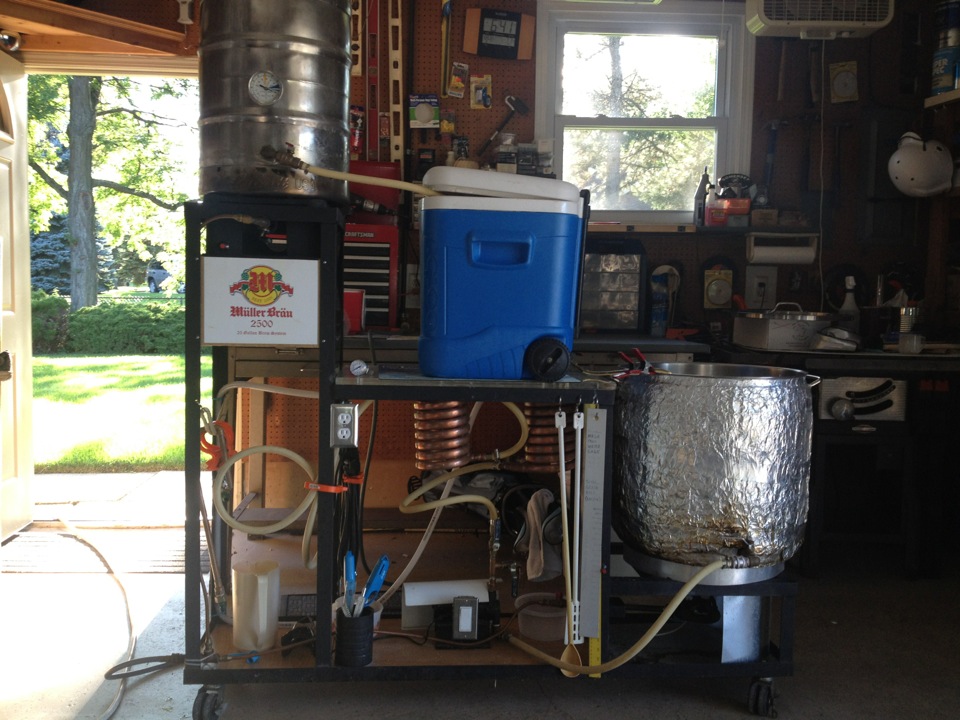
Adjustable Height 100K BTU Brew Kettle Burner and HD Swivel Casters |
Completed 20 g Capacity Brew Cart |
Back Side of New Cart | Close Up of Pump and Drip Guard |
 |
 |
 |
 |
|
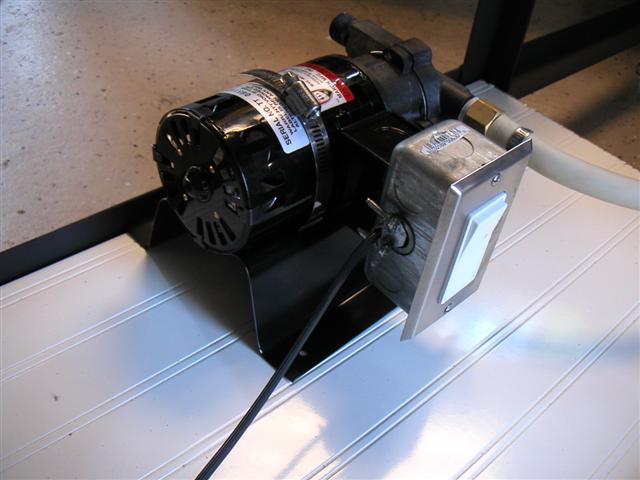
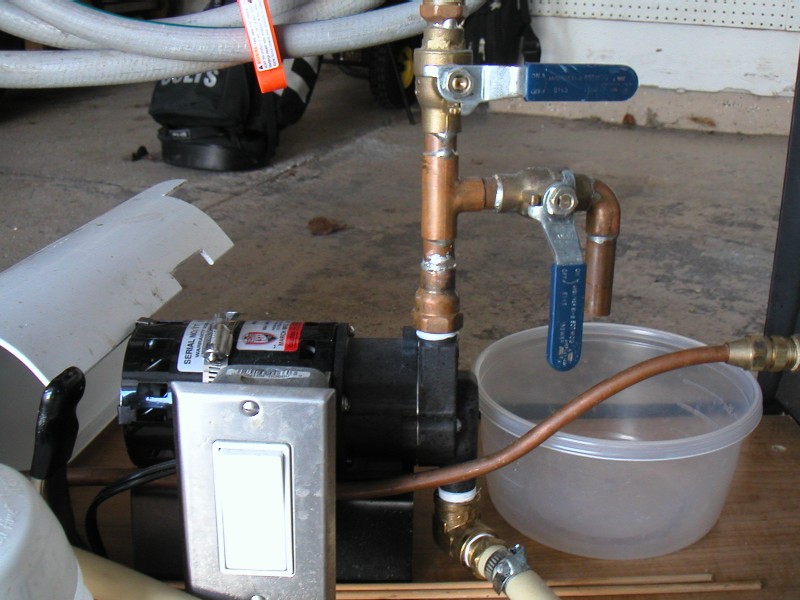
Fabricated Base for March Pump |
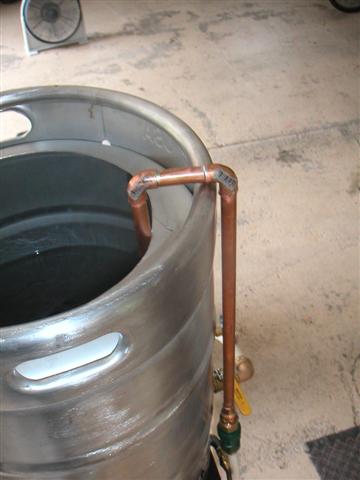
Homemade Counter Flow Chiller (CFC) |
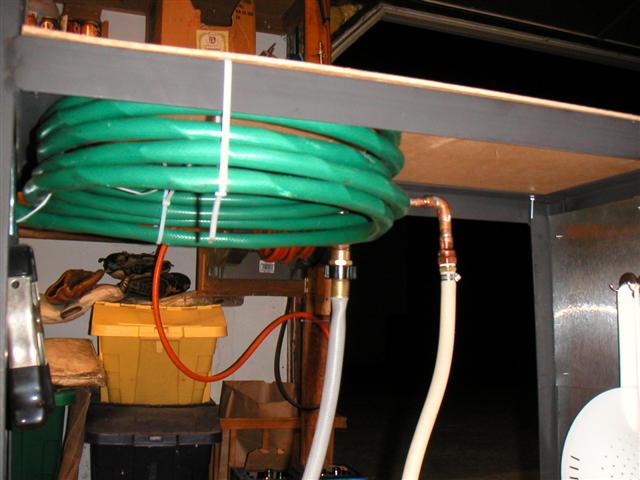
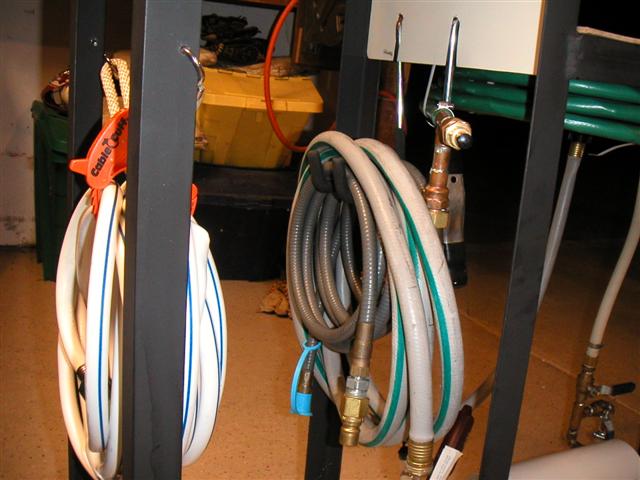
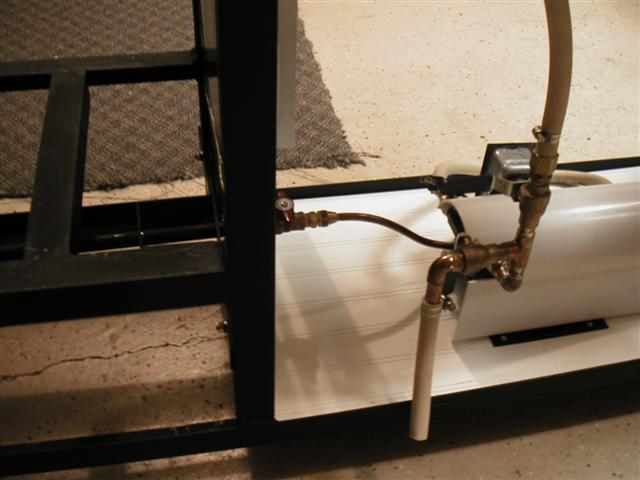
Hoses and Gas Line Hang Neatly | Special Priming Valve Plumbing |
 |
 |
 |
 |
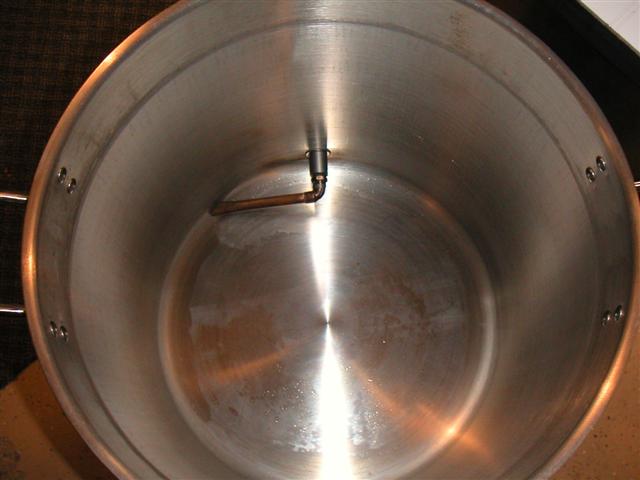
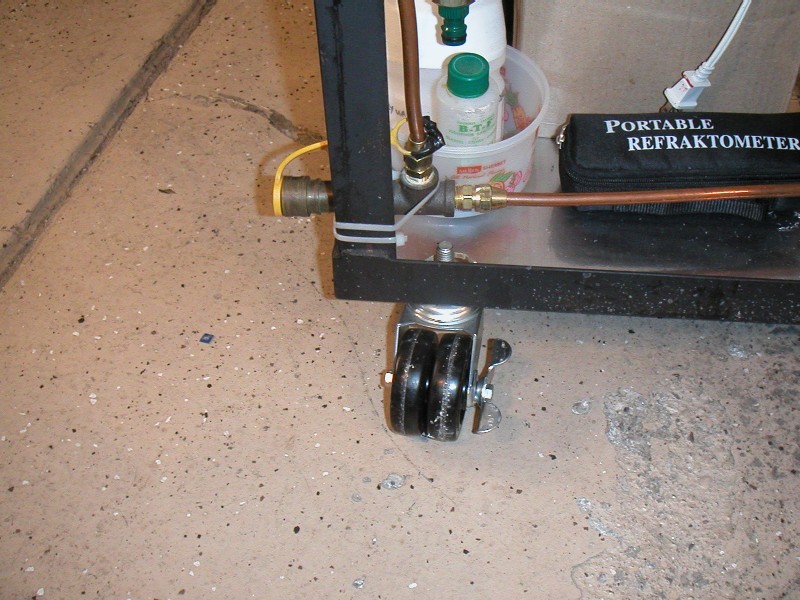
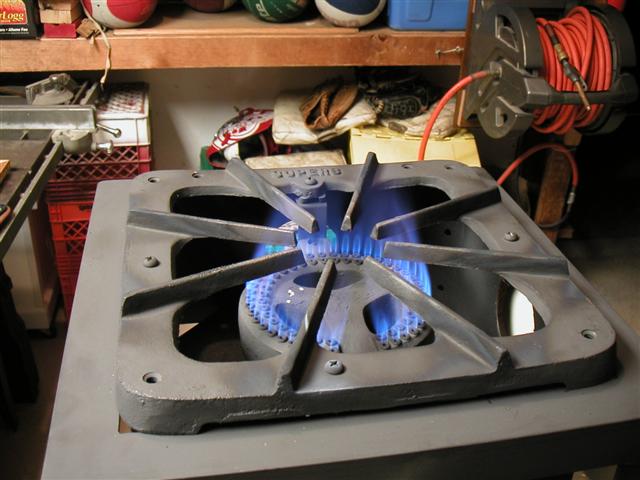
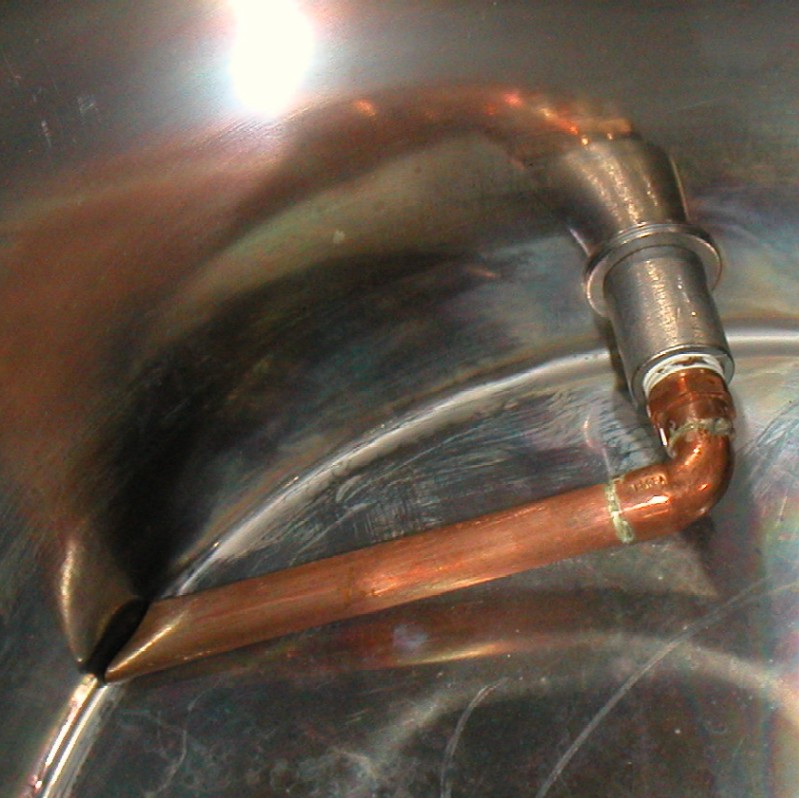
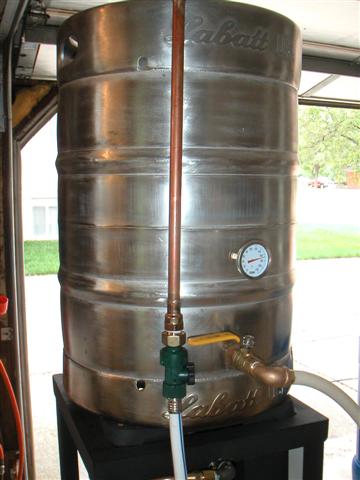
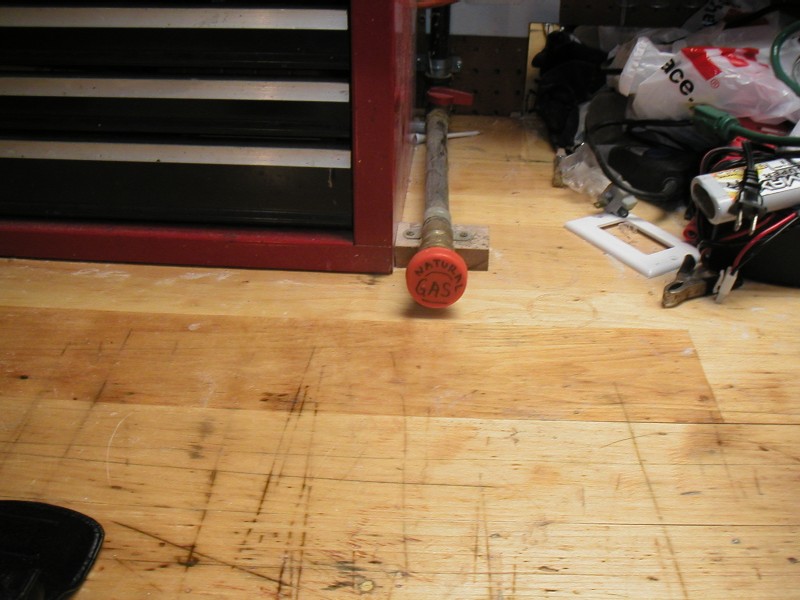
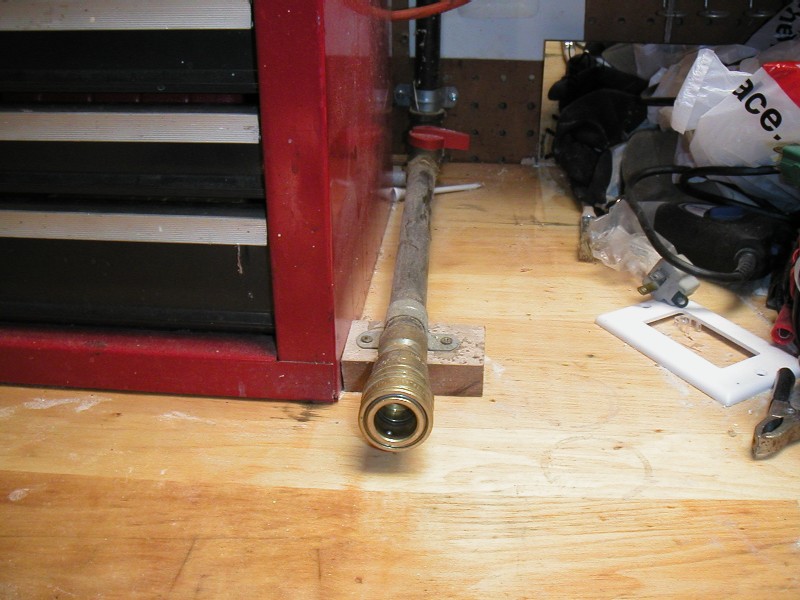
| Wort Pickup Tube in 25 g Brew Kettle | Quick Disconnect for Natural Gas and Locking 250# Capacity Swivel Casters | Superb Burner 35k BTU Fits In Frame | 58k BTU Ring Burner Flame Test |
 |
 |
 |
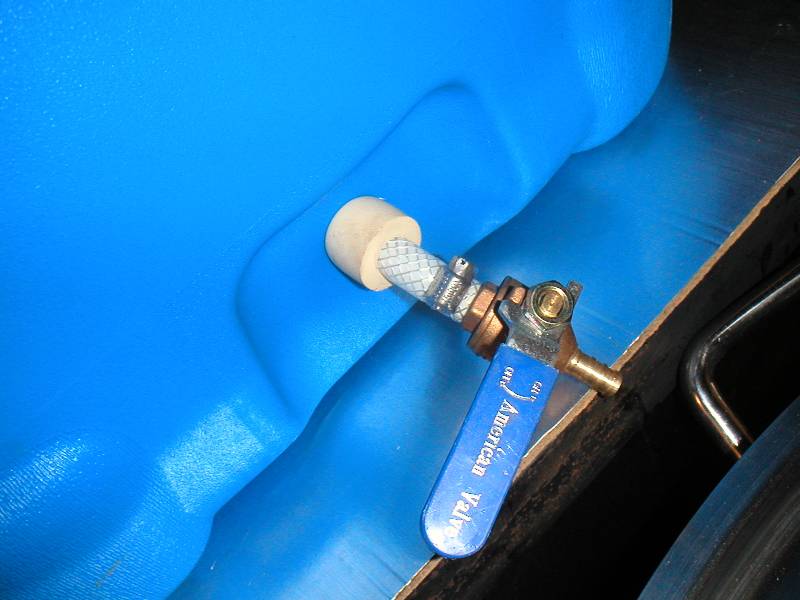 |
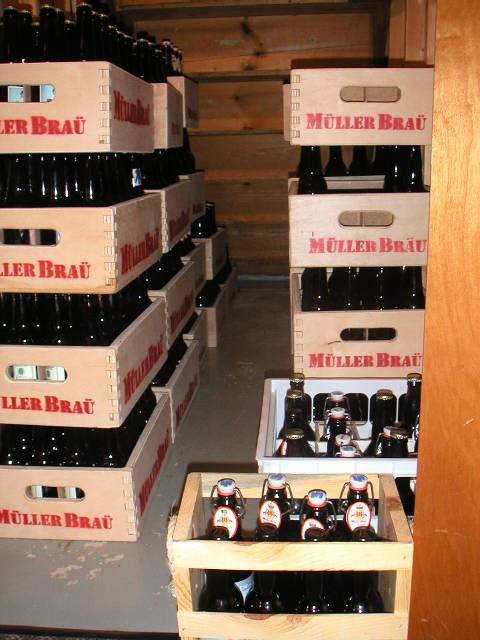
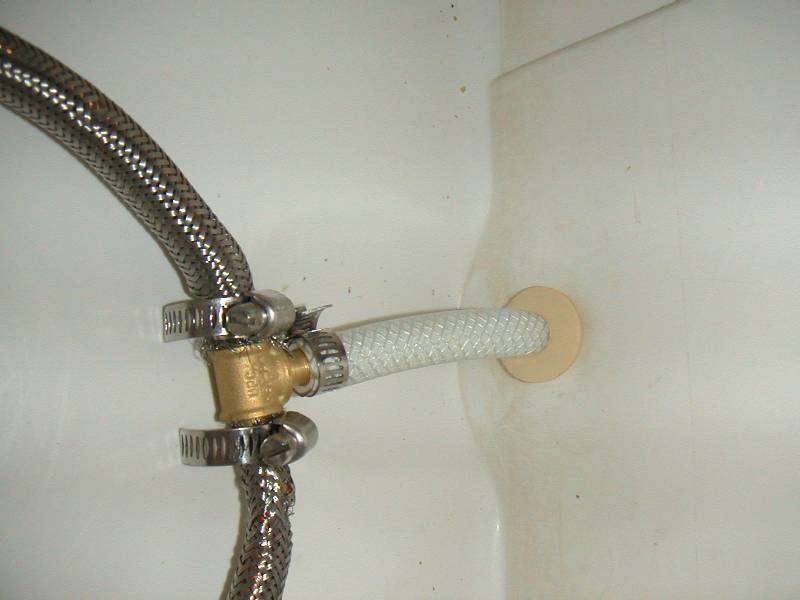
| Homebrew Stash - Full Cases on Right; Empty Cases on Left | SS Braided Manifold w/Copper Tube Inside to Keep Shape | Closeup of Tee and Connection Through Mash Lauter Tun | Closeup of Ball Valve and Connection Through MLT |
 |
 |
 |
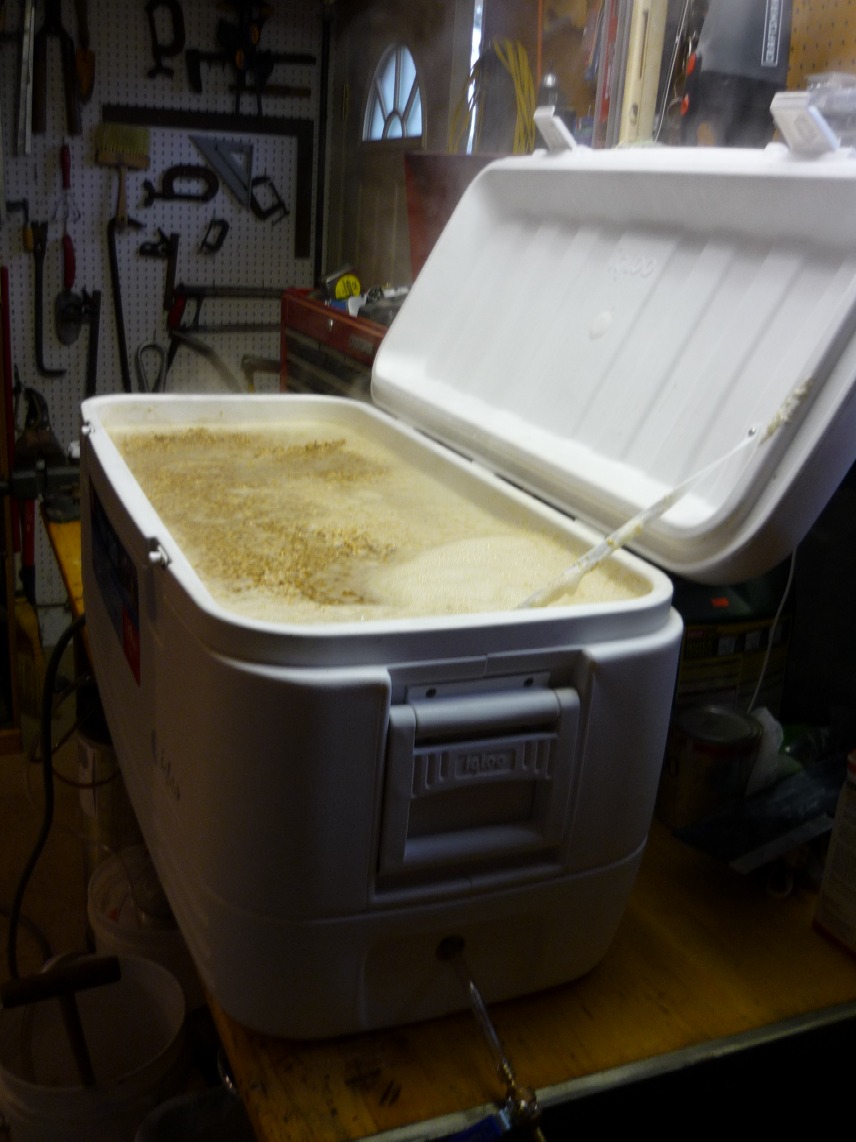 |
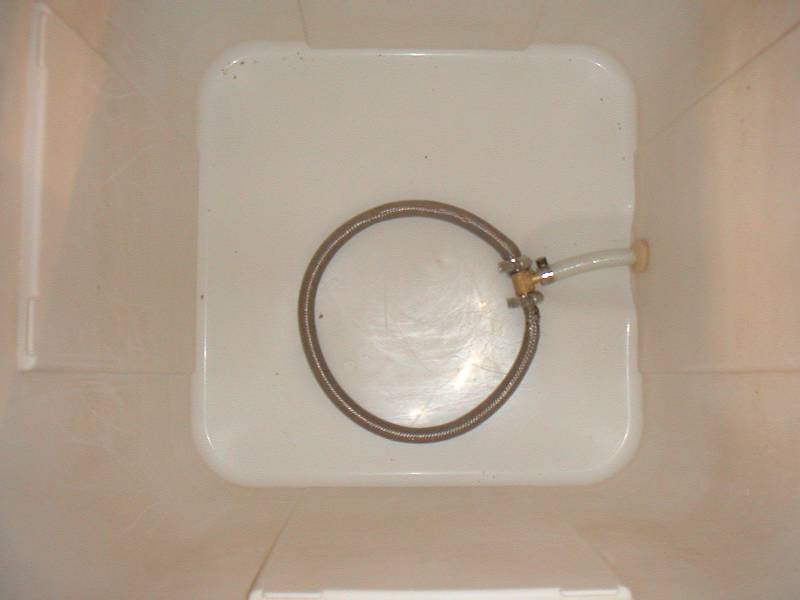
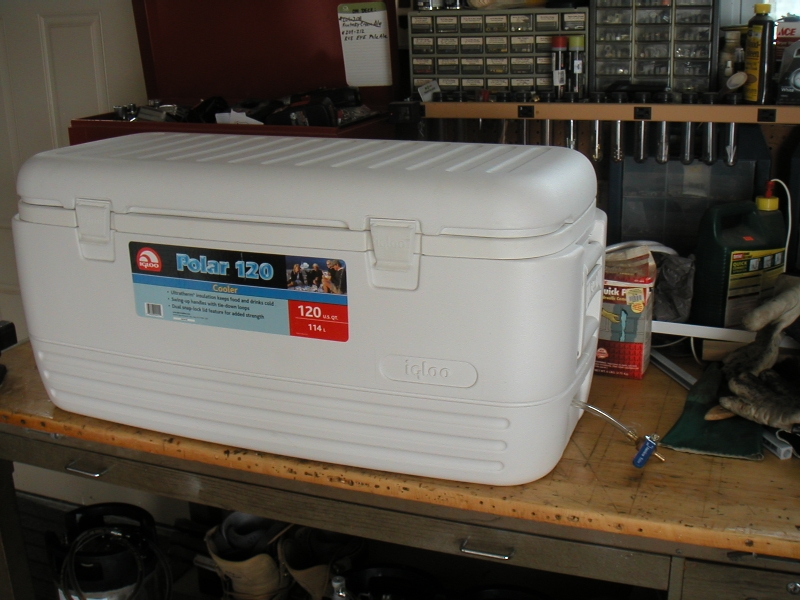
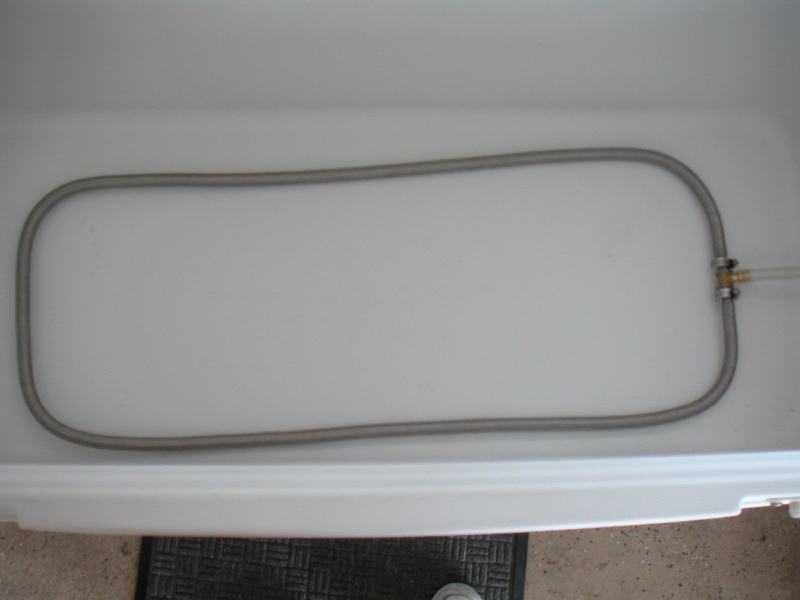
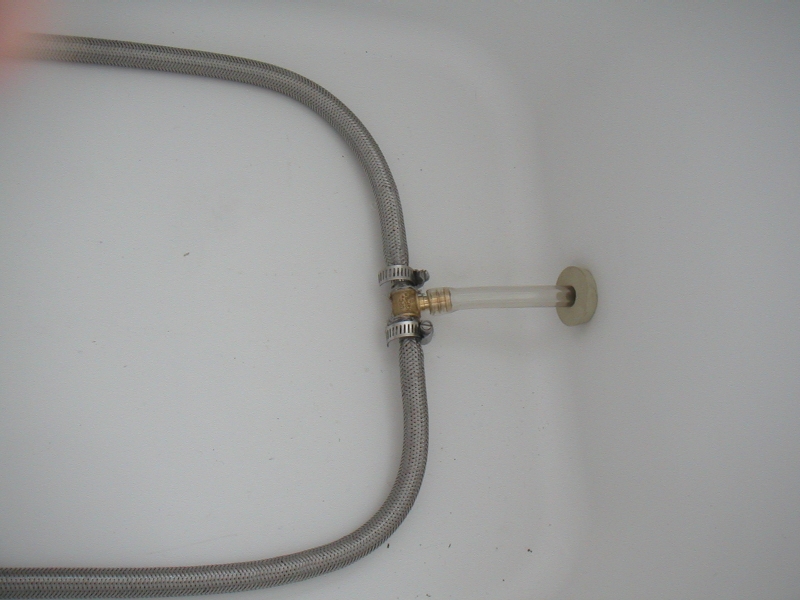
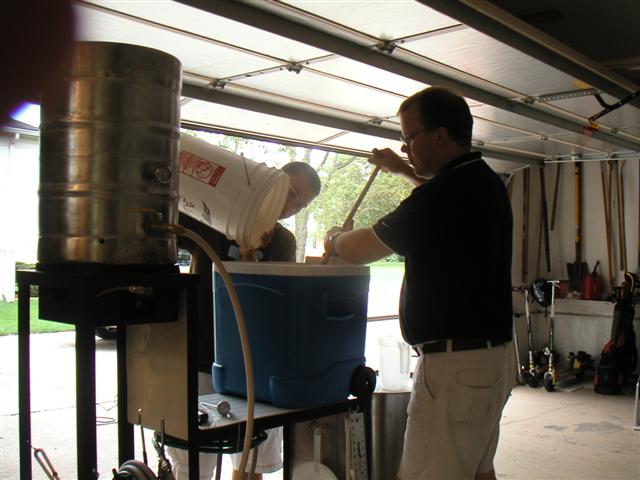
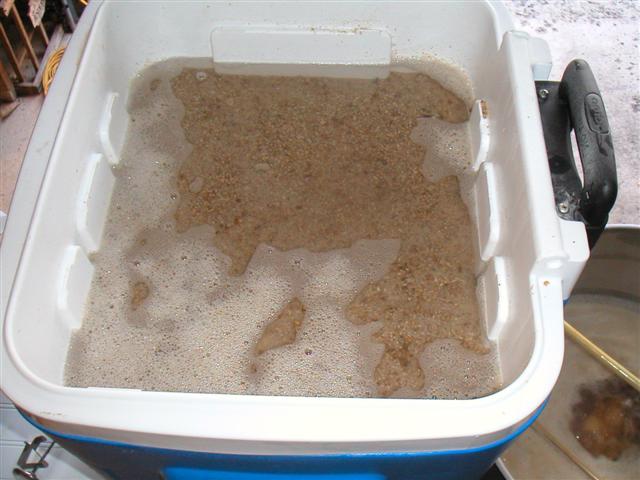
| 120 Quart MLT for Making up to 20 Gallons of Those Really Big Beers | 120 Quart Manifold - 8' Long Braided SS Mesh with 1/4" Copper Tubing Inside | 120 Quart MLT - Close Up of Bulkhead (#6 Drilled Stopper w/ 3/16"ID Bev Line | 120 Quart MLT in Action with 65 Lb. Grain Bill - 24 Gallon Rye IPA Fly Sparged for 83% Mash Efficiency |
 |
 |
 |
 |
| Pic of Entire System Ready to Brew | Close Up View of Brew Kettle Pickup Tube | Small Yeast Starter Instructions | Two Yeast Starters Ready to Go and Cane Sugar for the Belgian Tripels |
 |
 |
|
 |
| Prepared Some Snacks for the Brew Session | Weighing Out Grains | JSP Grain Mill Ready to Go | Doughing-In the Grain Bill |
 |
 |
 |
 |
| HLT with Homemade Shephards Hook | Homemade Shephards Hook to Fill HLT | The Mash @ 154°F | The Mash During Fly Sparge |
 |
 |
 |
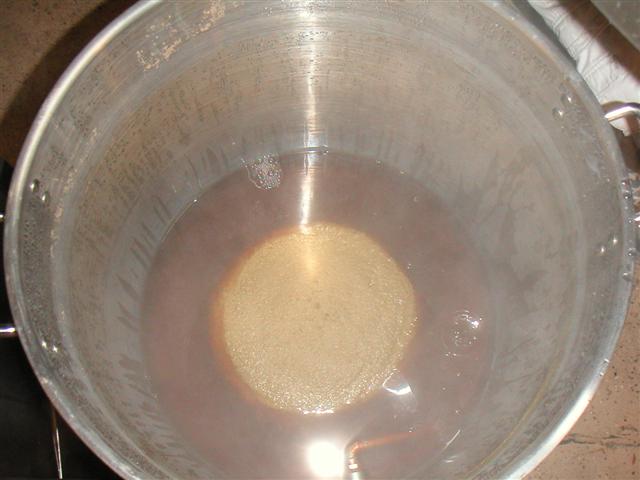 |
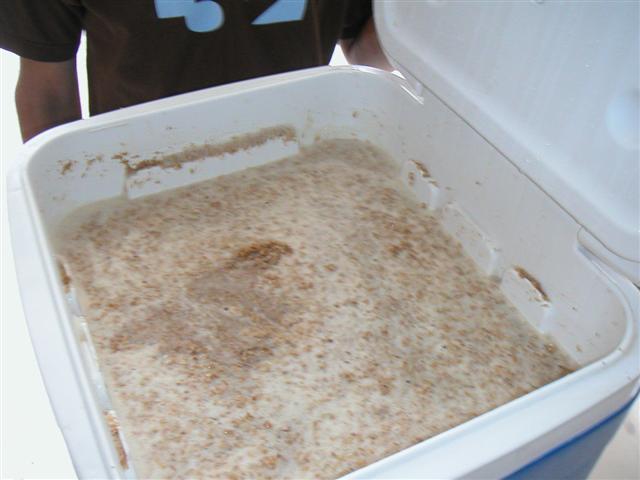
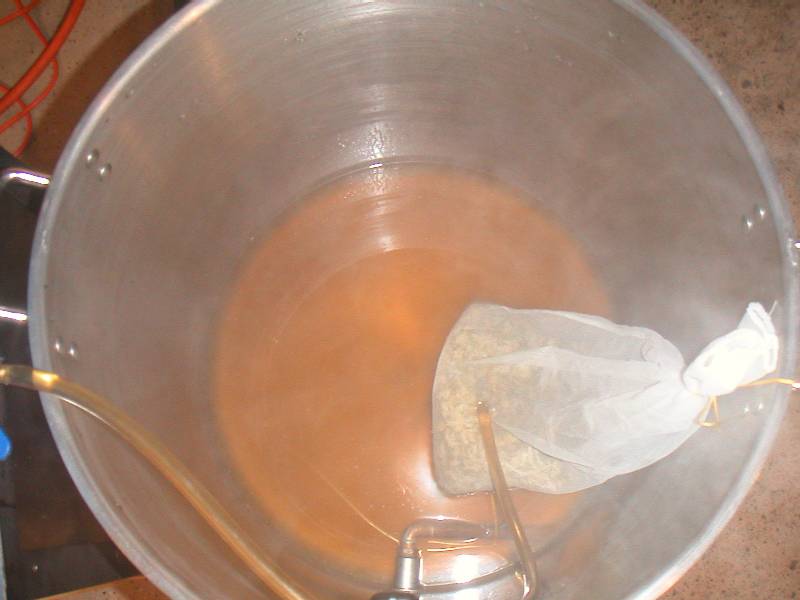
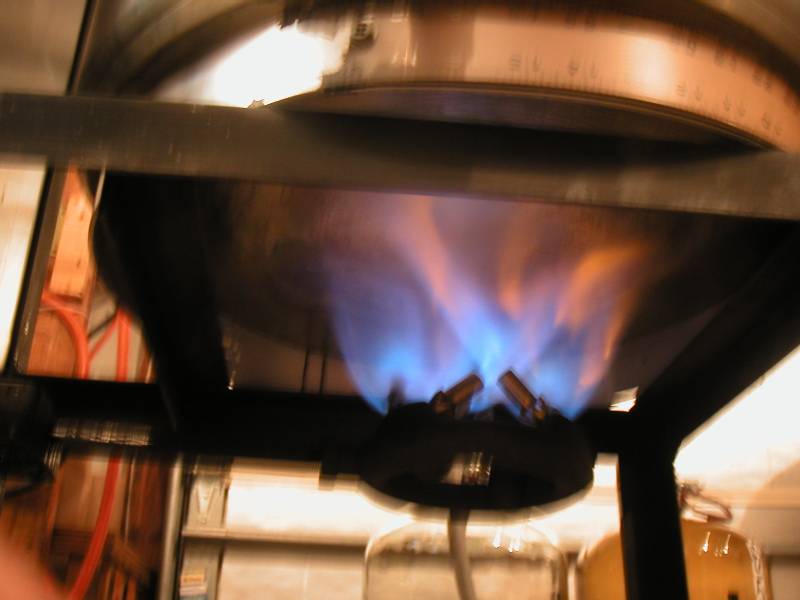
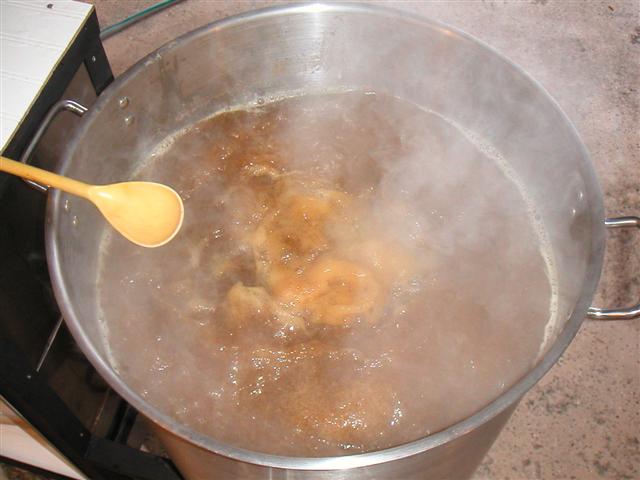
| Collecting the Sweet Wort - FWH (Full Wort Hops) in Bag | Apply 100,000 BTU's Heat - Natural Gas | 20 Gallons Wort Starting to Boil | Whirlpool Hot Wort |
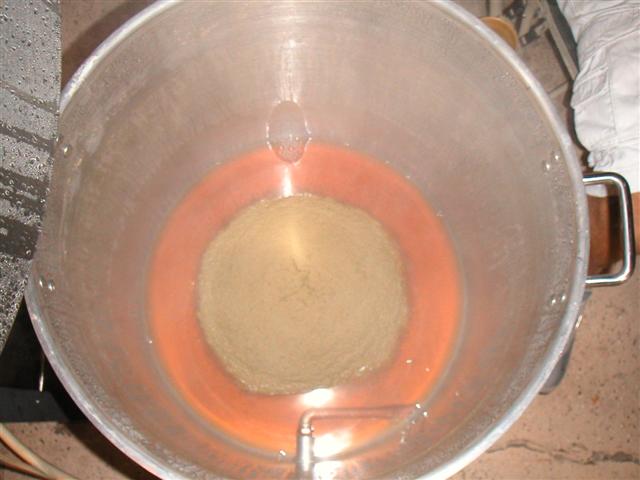 |
 |
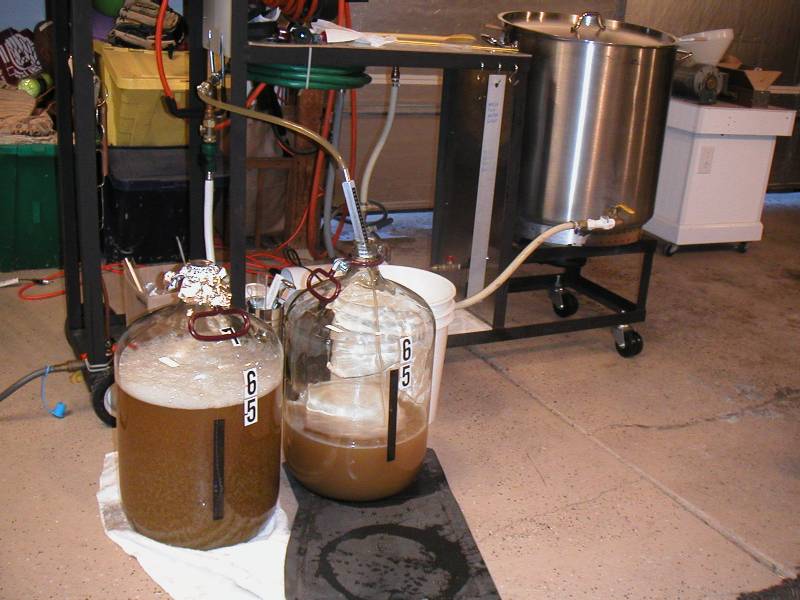 |
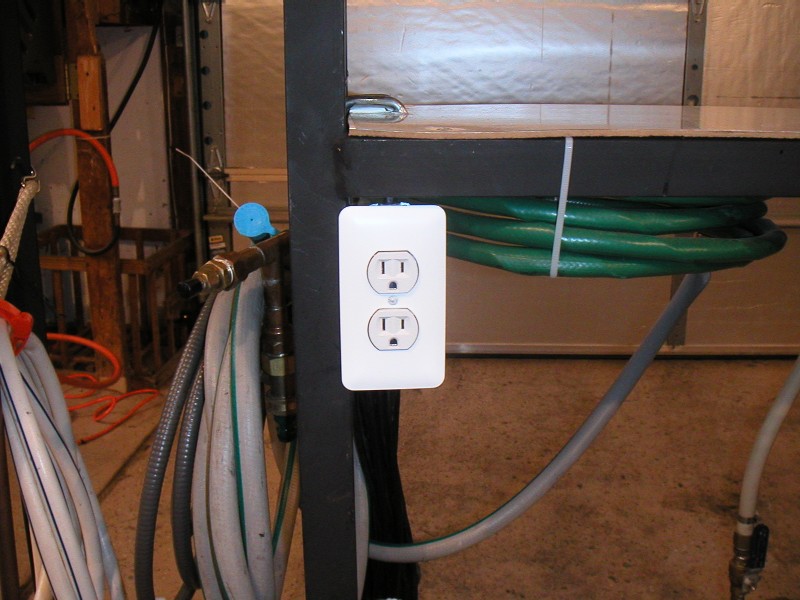
 |
| Whirlpool Results w/ Wort Pickup Tube - Just One Little Tip and It'll Be Empty | Recent Upgrade - 110V Outlet GFCI Protected | Pumping Thru CFC and Into Primaries | Resulting Cold Break |
 |
 |
 |
 |
| Wine De-Gasser Tool in Drill Makes Aeration Task Easy | Big Bore Blow Off Tubes (BBBOT) Ready for an Active Fermentation | Blowoff 12 Hours Later | Brew Stand Stored Neatly Away |
 |
 |
 |
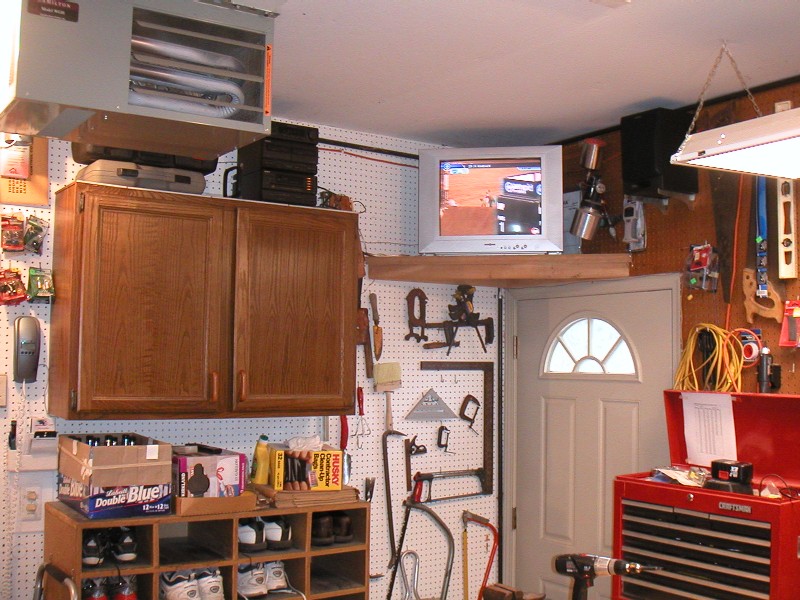 |
| Recent Upgrade - Cord Storage for 110V Outlet with GFCI | Natural Gas Hard Piped to Workbench | Natural Gas Quick Disconnect for Brewcart via 15' Flex NG Hose | Brew Area - Phone, Furnace, Stereo, Cable TV, etc. |
 |
 |
 |
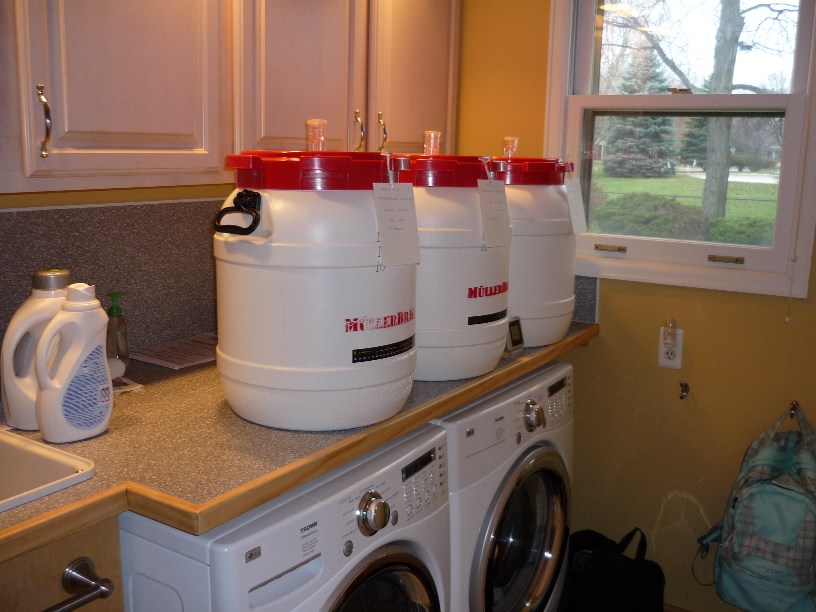 |
| 15 Gallon Plastic Fermenters | 15 Gallon Plastic Fermenters | Closeup of 15 Gallon Fermenter Full with 12 Gallons of Irish Red Ale | Results of 11-2008 Big Brew Day with 21 Gallons Clearwater Light Blonde Ale and 12 Gallons BVIP |
 |
 |
 |
 |
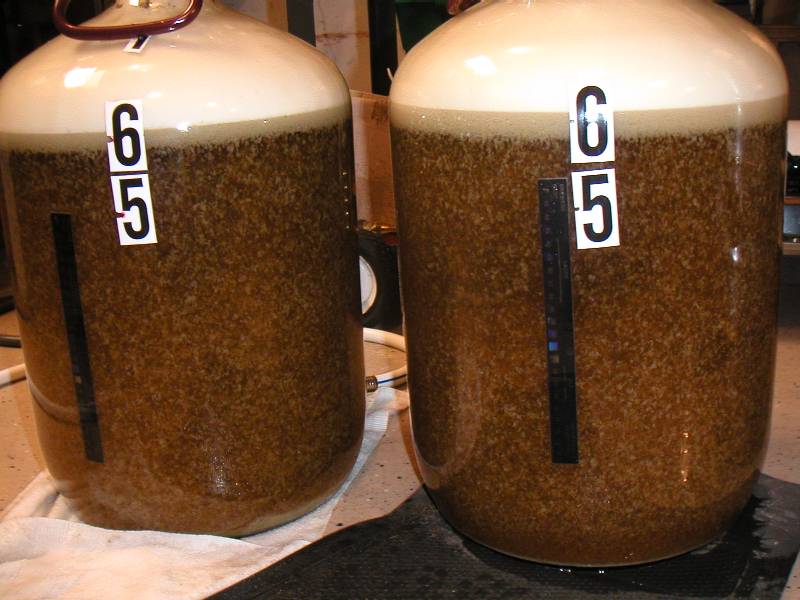
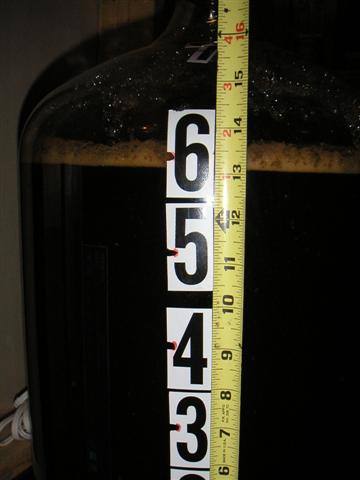
| Three of My Four Plastic Fermenters Happily Bubbling Away at 66°F | Secondary Fermenting Room and Keg Storage Area - New Upper Deck Added 11-2008 for Ease of Racking to Kegs | Reference Picture of Volume vs Height on a 6.5 Gallon Glass Carboy | Brewday 15 Gallons of Rye IPA |
 |
 |
 |
 |
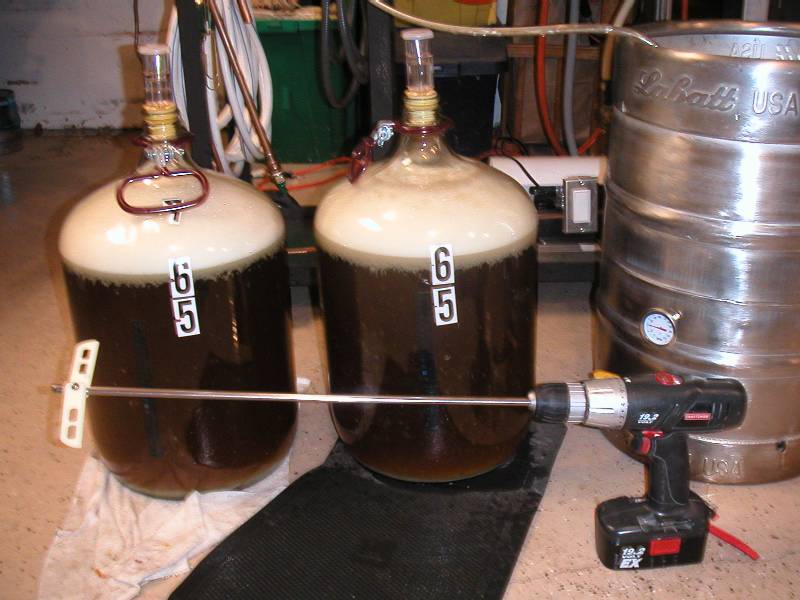
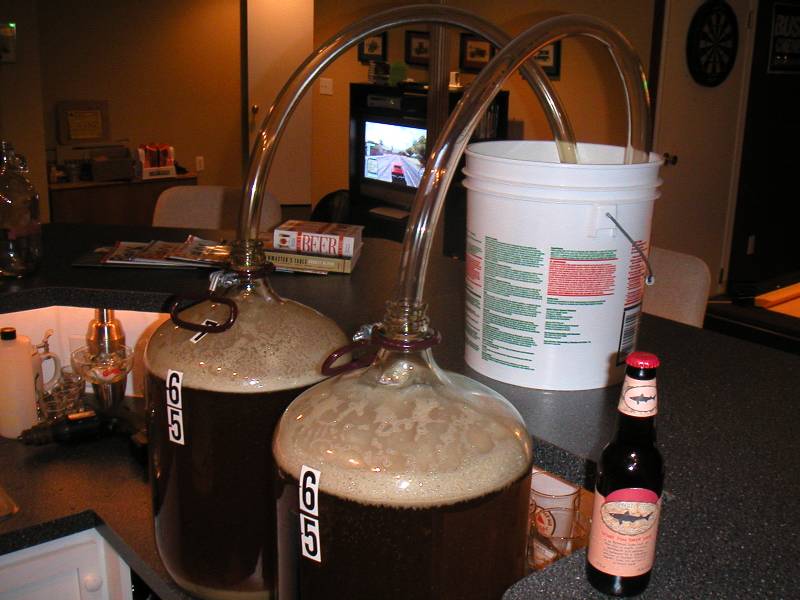
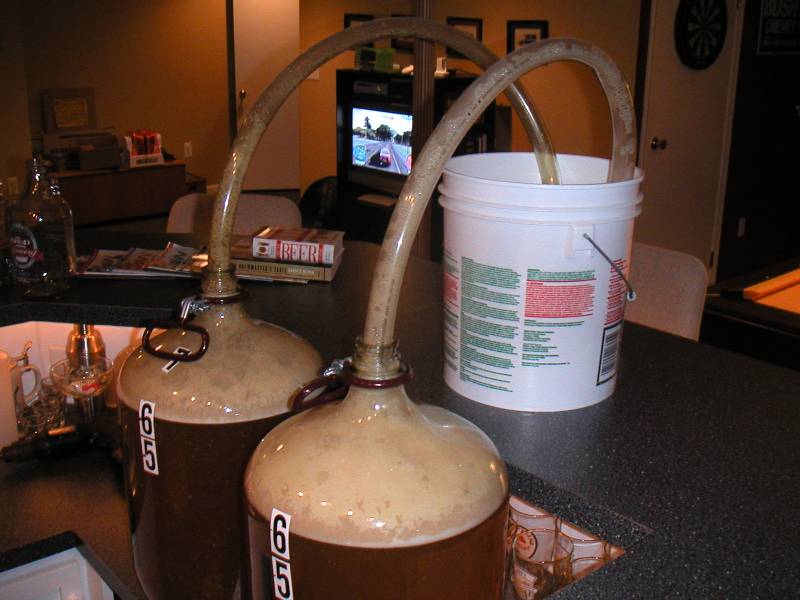
| Pumping 15 Gallons 212°F Hot Wort Through Counterflow Chiller and Into Awaiting Fermenters | Pumping 15 Gallons 212°F Hot Wort Through Counterflow Chiller and Into Awaiting Fermenters | Dumping Hops and Trub Afterwards | Resulting Beer a Month Later - Rye IPA |
 |
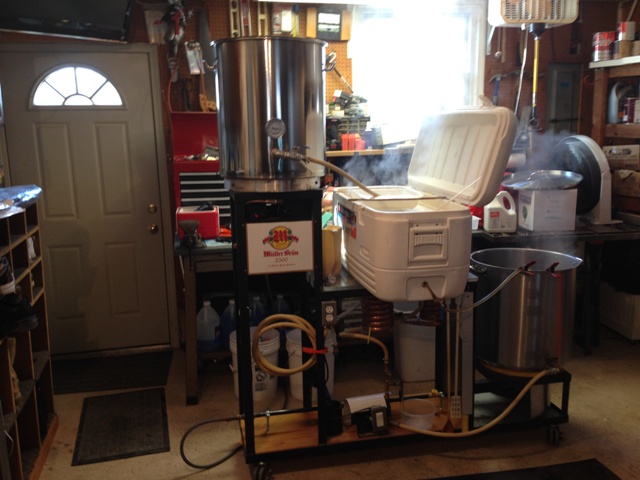 |
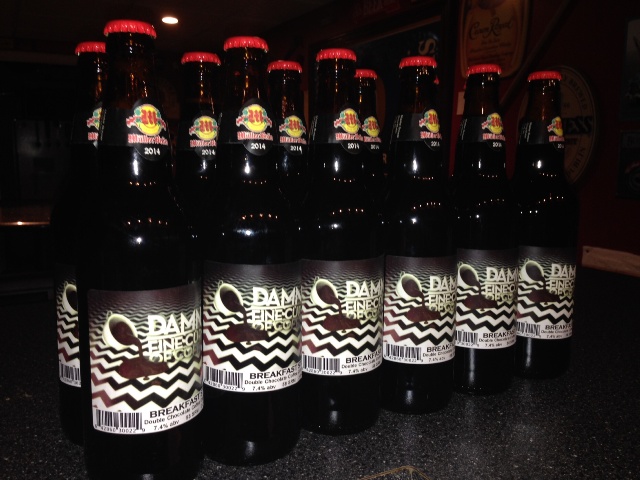 |
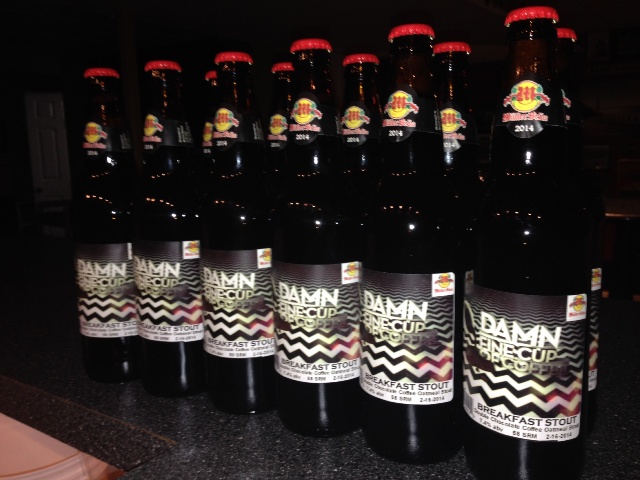 |
| New HLT Put Into Action Today Holds 25 Gallons 2-15-2014 | Brew Cart in Action with New 25 Gallon HLT and Twin ChillZilla CounterFlow Chillers | My Breakfast Stout Bombers Bottled Today from the Keg | My Breakfast Stout Bombers Bottled Today from the Keg |
Greg Muller - Troy, Michigan USA